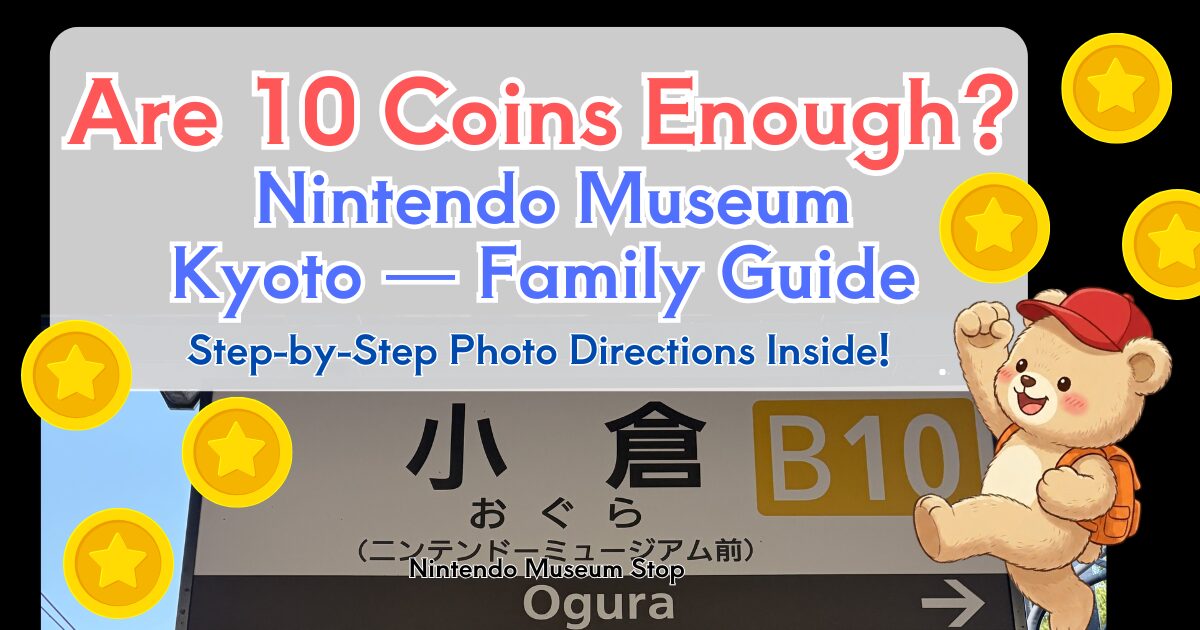
If your kids have ever watched you get misty-eyed over an old SNES cartridge, the Nintendo Museum in Kyoto was made for your family. 🎮🐻
We visited in late May 2026 — me, my husband, and our two kids (ages 9 and 7) — and walked out four hours later with empty coin wallets, full hearts, and one very large Super Nintendo controller cushion under my arm.
Before we went, I searched everywhere for a detailed English guide to share
with international families — and couldn’t find one. So here’s the honest
report I wish overseas visitors had access to. 🐻✨
- ✅ You’ve booked tickets but have no idea what to expect on the day
- ✅ You’re wondering whether 10 coins is actually enough for kids
- ✅ You want the practical family details — ID, food, strollers, how long — before you go
I’m a Super Nintendo and Game Boy Color kid living in Japan — and I may have cried a little in the exhibition hall. This is our real family report, no fluff. 🐻✨
※This article contains affiliate links. We may earn a small commission at no extra cost to you.
🇯🇵 この記事を日本語で読む
- 🎮 3 Things to Know Before You Go (Read This First)
- 🎫 Tickets & Cancellation: Don’t Issue Your QR Until You’re Sure
- 🚃 Getting There: Kintetsu Ogura Station (10-Minute Walk)
- 🛂 Arrival & Entry: Airport-Style Security + ID Check
- 🖼️ The Exhibition Hall (No Photography) — Where Parents Fall Apart
- 🕹️ The Experience Zone: Full Token Guide (What We Played, What We’d Skip)
- 🍱 Food & Drinks: Plan Around the Café Crush
- 👶 Family Facilities: Strollers, Baby Changing & Lockers
- 🛍️ The Shop: Keep Your Entry Pass Until the Very End
- 📱 Stay Connected: Mobile Data for Your Japan Trip
- 🗓️ Building a Kyoto Day Around Nintendo Museum
- ✅ Pre-Visit Checklist
🎮 3 Things to Know Before You Go (Read This First)
Before the fun stuff — here are three things that will genuinely catch you off guard if you don’t know them in advance.
① Everyone Needs ID — Yes, Including Young Kids
This one surprised us. When you collect your entry pass at the gate, every person in your group needs to show ID — including young children. For adults, it must be photo ID (passport, driver’s license, or Japan’s My Number Card). The official Nintendo Museum website states clearly: “We may refuse entry if we cannot verify your identity.”
We brought our My Number Cards. Do a bag check before you leave the hotel — if one person forgets theirs, your whole group gets turned away at the door. 🐻
② You Get 10 Play Tokens Per Person — and You Cannot Buy More
Each entry pass comes loaded with 10 play tokens per person. These are your “currency” for the interactive experience zone. Once they’re gone, they’re gone — there is no way to buy more. This means every token counts, and choosing where to spend them is genuinely part of the fun (and the strategy 😅). I’ve put together a full token breakdown later in this guide.
③ No Food Inside — Eat Before You Enter
The museum is largely food-free (exceptions: baby food, small snacks for young children, allergy-related needs). There is a café on-site, but it was packed solid when we arrived at 2pm — a line out the door, no seats visible. There are also vending machines where you can grab a drink, but you must drink it standing right there — no seating.
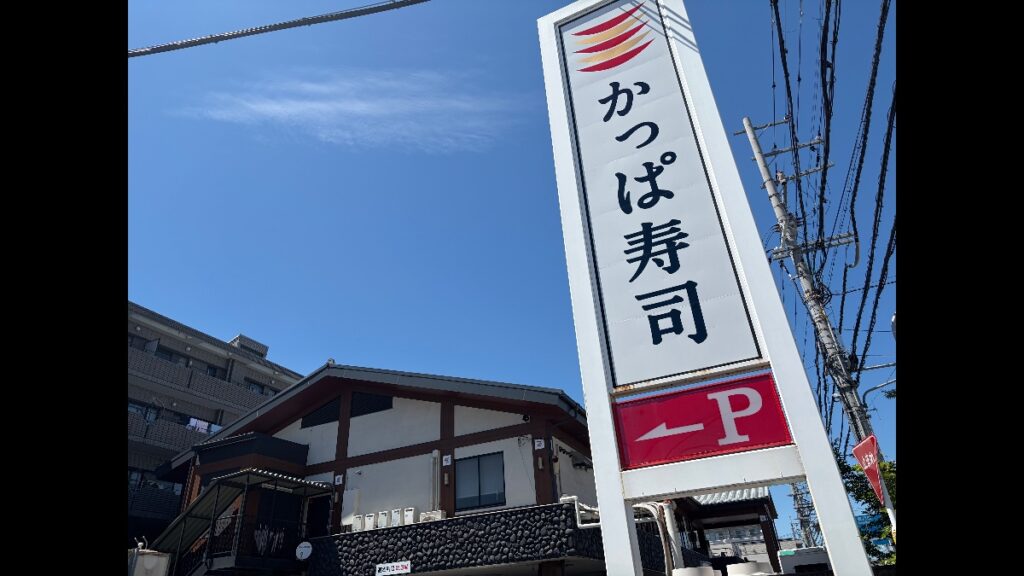
Our solution: we booked Kappa Sushi (a conveyor belt sushi restaurant) at 1pm — it’s literally on the walking route from the station to the museum. Family-friendly, kids actually eat it, and you arrive satisfied. If you’re visiting around lunchtime, I strongly recommend eating beforehand. Arriving hungry with kids who won’t touch the café menu is… not the vibe you want. 🍣
📌 Quick numbers to know
· Our total visit: 3 hours 45 minutes (2:00pm–5:45pm)
· Busiest time: 12:00–3:00pm — café lines, experience queues, everything peaks here
· After 5pm: noticeably quieter — shorter queues, café becomes accessible
· Free cancellation: available before QR ticket is issued (details below)
🎫 Tickets & Cancellation: Don’t Issue Your QR Until You’re Sure
Nintendo Museum uses an advance reservation system with a QR code ticket. The part that’s genuinely family-friendly: you can cancel for free, as long as you haven’t issued (displayed) your QR code yet. Kids get sick. Plans change. This policy is a lifesaver.
Our recommendation: hold off on issuing your QR until you’re confident you’re going. Once displayed, you likely cannot cancel.
✅ Free cancellation conditions (based on official guidelines)
① The cancellation is made before your visit date
② Your QR ticket has not yet been displayed/issued
③ You have not shared tickets with other members of your group
④ Cancelling will not leave a child-only ticket without an adult
No cancellation fee. Refunds are processed back to your credit card. Timing may vary.
⚠️ Cancellation rules and deadlines may change. Always check the official Nintendo Museum cancellation page for the latest information before making any changes to your booking.
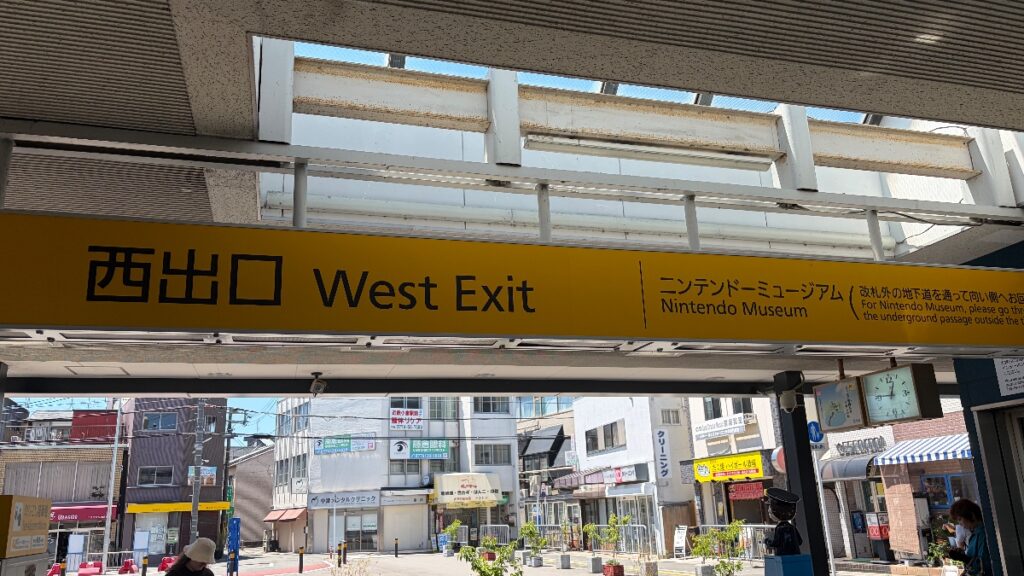
🚃 Getting There: Kintetsu Ogura Station (10-Minute Walk)
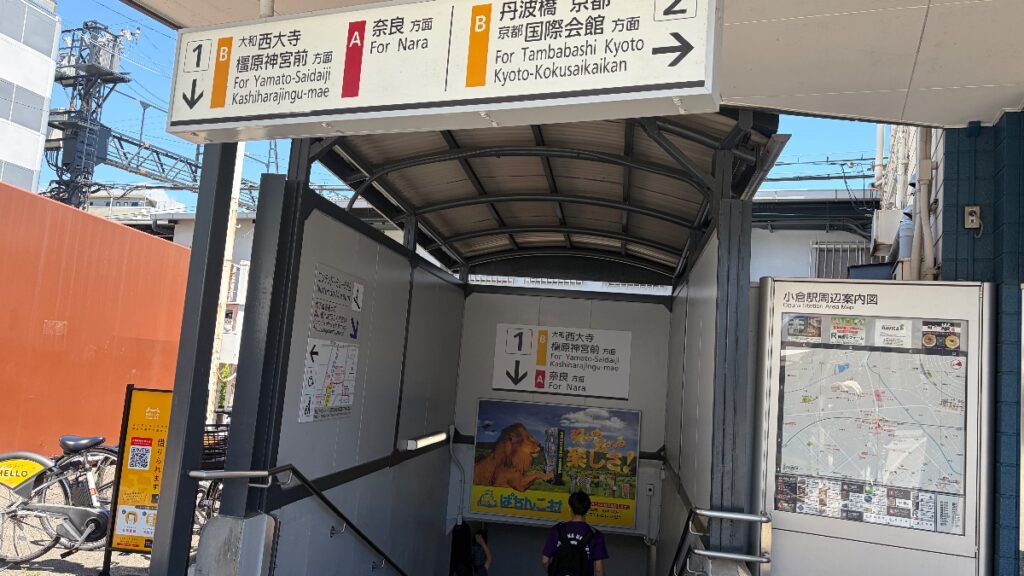
The nearest station is Kintetsu Ogura Station on the Kintetsu Kyoto Line. One important thing to get right: limited express and express trains do not stop here. You need a local or semi-express train. If you’re on an express, you’ll sail right past Ogura without stopping.
⚠️ Check before you board: Only local (普通) and semi-express (準急) trains stop at Kintetsu Ogura. Use Google Maps or a transit app with “Kintetsu Ogura” as your destination — it will automatically route you to the right train type.
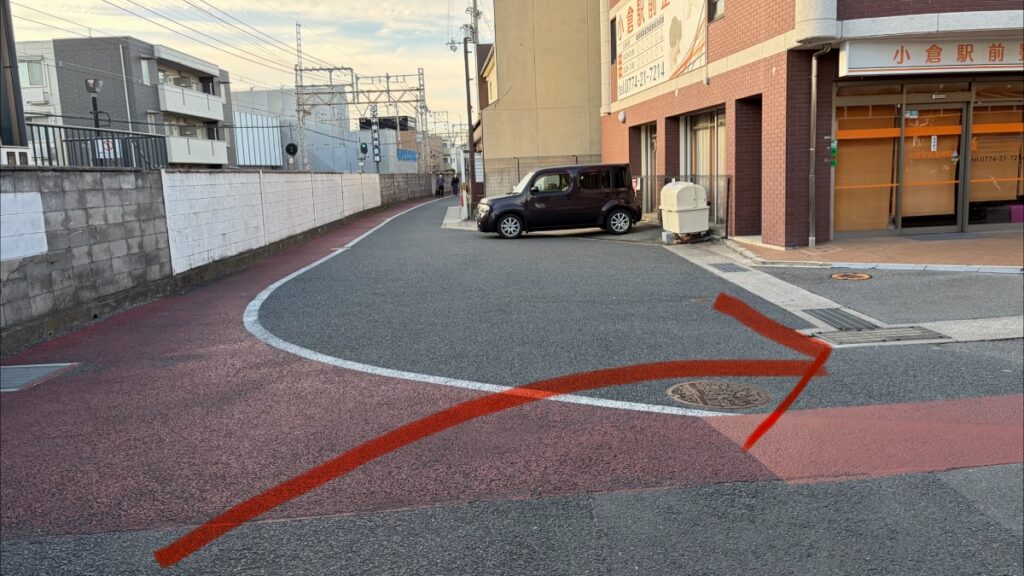
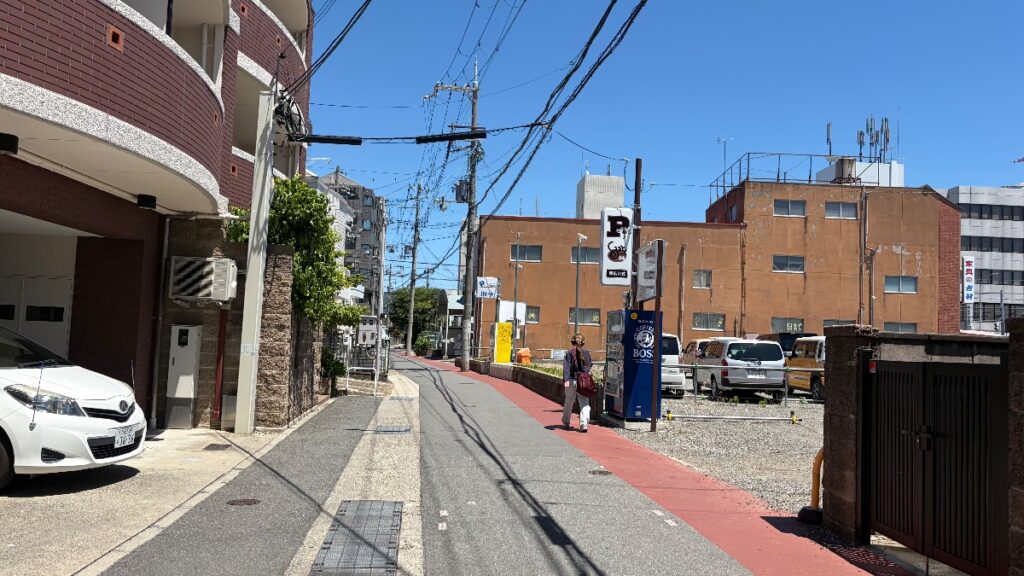
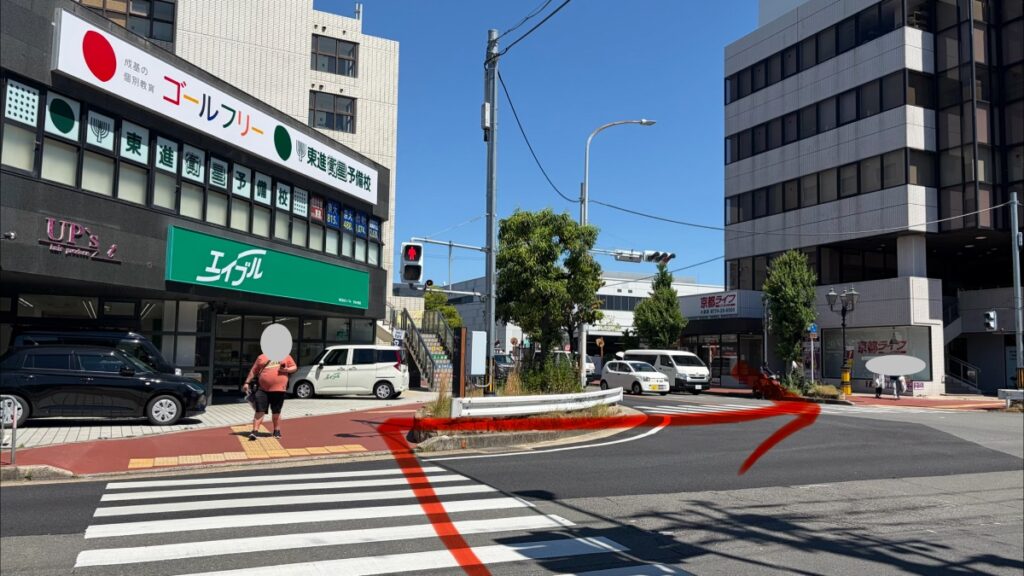
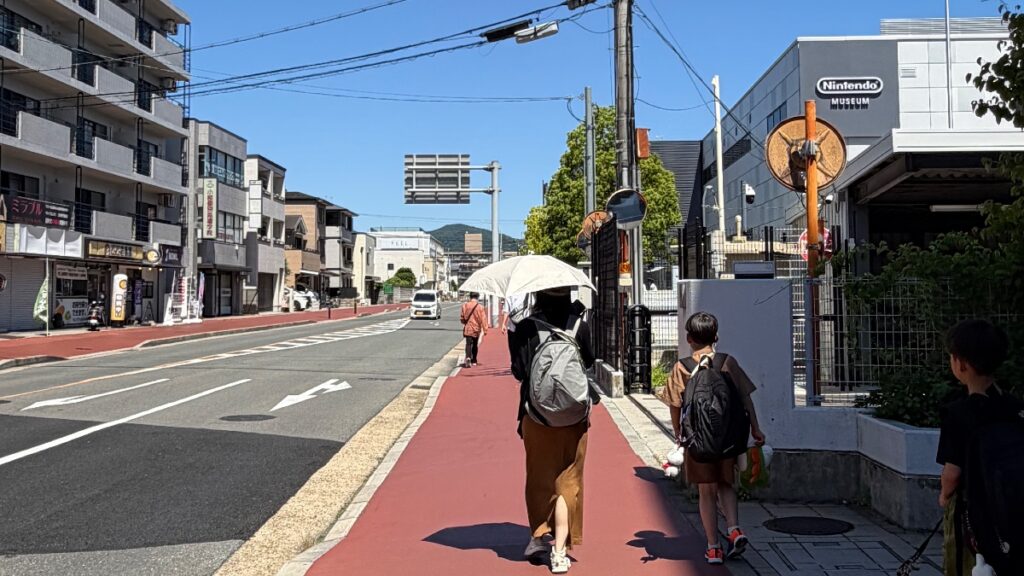
The station has only one ticket gate, so you won’t get confused. There’s a clean toilet inside — worth a stop before the walk, especially with kids. From the east exit, turn right and walk straight for about 10 minutes (elementary school pace). The route is mostly one straight road, easy to follow.
One note: the road has no separation between pedestrians and cars, so keep an eye on little ones. And if you’re visiting in spring or summer — bring a compact umbrella or hat. We went in May and my kids were already complaining about the heat by the time we reached the museum. The return walk at 6pm was fine, but the daytime sun is no joke. ☀️
🚗 No parking. No bike parking. Nintendo Museum does not allow cars, motorcycles, taxis, or bicycles on-site. Public transport only.
💡 You’ll want reliable mobile data for Google Maps on this walk — and throughout your Japan trip. We use the Airalo eSIM (Moshi Moshi plan), which runs on SoftBank and supports hotspot tethering so the kids can stay connected on their tablets too.
🛂 Arrival & Entry: Airport-Style Security + ID Check
A security guard at the entrance will ask what time slot you have and direct you to the right queue. We waited about 10 minutes to reach the ticket scanner.
Entry involves airport-style bag screening — a metal detector gate plus a conveyor belt X-ray. Take out your phone, laptop, and portable battery (power bank) from your bag in advance. Having them ready in an outer pocket makes this much smoother with kids in tow.
This is also where you collect your entry pass — the card that functions as your door pass and your token wallet. Remember: all members of your group need ID here, and adults must show photo ID. Don’t skip this step in the packing phase.
Just inside the entrance is a photo spot with a giant warp pipe 🪠. A staff member will take a photo on your own phone — there’s a luggage shelf so you’re not holding bags. At 2pm we waited about 5 minutes. By 5:30pm, there was no queue at all. Worth knowing if you want a stress-free family photo.
🖼️ The Exhibition Hall (No Photography) — Where Parents Fall Apart
The first thing you’ll see: oversized versions of every Nintendo controller ever made, suspended from the ceiling. The collective “woahhh” from families entering is real.
Then comes the main exhibition — original hardware, cartridges, and packaging from the Famicom era all the way through Switch. Every console, every iconic game. I spotted Donkey Kong Country 2, Kirby, Dragon Ball, Yu-Gi-Oh!… games I hadn’t thought about in 25 years.
I’m a Super Nintendo (SNES) and Game Boy Color kid. Seeing the cartridges I grew up with — including ones I’d completely forgotten existed — genuinely made me tear up a little. My husband (who’s not a sentimental person) snuck back to the exhibition hall on his own later and spent another 20 minutes in there. He also quietly bought a pamphlet. He never buys souvenirs.
Our kids were itching to get to the experience zone, but this hall is where the adults lose track of time. The kids can head ahead while you catch your breath over a 1994 Kirby cartridge. 🎮
📷 No photography in the exhibition hall. The experience zone (ground floor) allows photos and video — but the exhibition upstairs does not. Please respect this rule.
🕹️ The Experience Zone: Full Token Guide (What We Played, What We’d Skip)
This is the heart of the museum. Each person has 10 tokens loaded onto their entry pass, and you spend them at interactive experience stations. There are 8 experiences in total — here’s the full breakdown.
📊 Full Token Cost & Wait Time Reference
| Experience | Tokens | Wait (our visit) | Notes |
|---|---|---|---|
| Zapper & Scope SP | 4 (max) | ~20 min | Large-screen shooting game. Go for the small gun — higher scores. Most expensive experience. |
| Shigurehana SP (hanafuda cards) | 2 | ~5 min | Floor-projection card hunt. No Japanese needed. The floor visuals are stunning — enjoy them before the game starts! |
| Ultra Machine SP (batting) | 2 | Short | Soft bat batting. Hitting the wall triggers moving props — kids love the surprise. 🏏 |
| Nintendo Classic (SNES/Famicom/N64) | 1 | Almost none | 7 minutes on retro consoles. 1–2 machines always free. Our family MVP — see below. |
| Ultra Hand | 1 | Short | Mechanical arm grabs Poké Balls and Voltorbs. Trickier than it looks. |
| Big Controller | 2 (×2 players) | Varies | Giant Famicom/SNES/N64/Wii controllers — operated by 2 people together. We didn’t get to this one 😢 |
| Love Tester SP | 2 (×2 players) | Varies | 2-player compatibility game based on a vintage Nintendo toy. |
| Game & Watch SP | 1 | Short | Based on Nintendo’s original handheld Game & Watch devices. |
🎯 Our recommended token strategy
The five experiences we played (Zapper + Shigurehana + Ultra Machine + Nintendo Classic + Ultra Hand) add up to exactly 4+2+2+1+1 = 10 tokens — a perfect spend.
Key rule: prioritize Zapper first if you want it — it’s 4 tokens and the most popular, with the longest queue. The Nintendo Classic (1 token, almost no wait) is a great “use up the rest here” option at the end. That’s exactly what our kids did — and it ended up being their favourite part of the day. 🐻
⚠️ Token costs are subject to change. Always check the current costs displayed on-site.
Zapper & Scope SP (4 tokens) — Worth the Queue
About 10 players shoot simultaneously at a large screen — it’s chaotic, loud, and a lot of fun. There’s a leaderboard at the end. I came 3rd. 🏆
Heads up: the rules are barely explained before the game starts. We spent our queue time watching the group ahead and strategising. Tips from our experience:
📍 How to score higher (unofficial tips from a 3rd-place finish)
📍 Take the small gun, not the big one. The top scorers were all using the small gun. Kids especially struggle with the large one.
📍 Enemies farther away = more points. Friendly characters = point deductions. Watch the screen carefully.
📍 By the final stretch, your trigger finger will be exhausted. Switch to rapid tapping — think button-mashing, not precise shooting. 😂
📍 Photography is allowed here — grab a shot of the final scoreboard!
Shigurehana SP — Hanafuda Card Hunt (2 tokens)
This one is based on traditional Japanese hanafuda cards — but you absolutely don’t need to know anything about Japanese card games to enjoy it. My 7-year-old and I played together with zero prior knowledge and had a brilliant time.
The floor becomes a giant illuminated screen with cards to find. In theory it’s about matching cards — in practice, once the game starts, it becomes “find the monk in the yellow robe!” and “grab the woman in the colourful kimono!” at full speed. Faster finds = more points. Completely accessible for young kids.
The floor visuals are genuinely beautiful — rippling water effects, fish swimming under your feet. Look down and enjoy it before the game starts, because once the countdown hits, nobody’s admiring the floor art. ✨
Ultra Machine SP — Batting (2 tokens)
Soft foam bats, a pitching machine, and a wall full of interactive props that react when you hit them. The props jumping and rattling when a ball connects gets a big laugh from kids every time. My kids and husband all had a go — I went back for a second round later. Tried to hit a Pikmin target on the wall. Never hit it. Still thinking about it. 😤
Nintendo Classic (SNES / Famicom / N64) — The Unexpected MVP (1 token)
This was the surprise of the day. For just 1 token, you get 7 minutes on a retro console — choose from Super Nintendo (SNES, called Super Famicom in Japan), Famicom, or Nintendo 64. There are always 1–2 machines available with almost no wait.
My older kid chose Donkey Kong Country 2 — a game he plays at home — and then played it again here for some reason that only a 9-year-old can explain. 😂 My younger one had never touched a Super Nintendo before. She picked Kirby’s Dream Land 3, couldn’t figure out how to walk at first, and then spent every remaining token at this station because she refused to leave.
I played DKC2 with my older kid and may have gotten just a little bit competitive. “Mama, you’re really good at this.” Best compliment of the trip. 🐻
🌏 English-friendly note
We saw staff helping international visitors at the Nintendo Classic station — a team member wearing an “English” badge approached and explained everything fluently. The consoles also offer a Japanese / English language toggle before you start, so overseas families can navigate the games without any language barrier. 🙌
Ultra Hand (1 token)
A mechanical extending arm — based on one of Nintendo’s original pre-video-game toys — to grab Poké Balls and Voltorbs moving along a track. My youngest managed to grab 2. “It’s hard!” was her verdict. Which, honestly, is part of the charm. 🐻
What We Missed (And One We Regret)
With 10 tokens, you cannot do everything — that’s by design. We skipped the Big Controller (giant 2-player controller for Famicom/SNES/N64/Wii games), Love Tester SP, and Game & Watch SP. I really wanted to try the Big Controller. The kids were not interested. Parenting. 🙃
🍱 Food & Drinks: Plan Around the Café Crush
When we arrived at 2pm, the café had a line out the door and a packed interior. We skipped it — the menu wasn’t quite right for our kids anyway, and the prices were on the higher side.
By 5pm, the café had almost no queue. If the menu appeals to your family, aim for that window. The vending machine area works for drinks — stand up, drink up, move on. There’s no seating there.
One useful tip: we noticed the vending machines inside had sold out of water and apple juice by late afternoon. But when we stepped outside near the umbrella stand at 5:20pm, there was a Kirby-themed vending machine with full stock — same drinks, no sold-out items. If you’re struggling to find your drink inside, check the outdoor machine. 🐻
👶 Family Facilities: Strollers, Baby Changing & Lockers
- Accessible toilets with baby changing tables: available — and because it’s a shared accessible toilet, both mums and dads can use it for nappy changes 👍
- Women’s toilets: have baby chairs, but no changing table — use the accessible toilet for nappy changes
- Nursing room: available (on the exhibition floor, where photography is not permitted — so no photo, but it’s there!)
- Stroller parking: available near the Shigurehana SP (hanafuda) experience area
- Coin lockers: available, but individual lockers are on the small side — not suitable for large suitcases. Suitcases can be secured in a separate designated area. If you’re coming from or going to another destination that day, pack a small day bag and leave the suitcase in the luggage area.
We’d heard the air conditioning was intense and packed a light jacket each. In the end — none of us needed it. My husband (who wears long sleeves in August) wore his throughout, but the kids and I were fine in t-shirts all day. Worth packing one just in case, but don’t stress about it.
🛍️ The Shop: Keep Your Entry Pass Until the Very End
Our family did some serious damage here. My older kid and I immediately fell in love with a giant Super Nintendo controller cushion. Was it expensive? Yes. Did we buy it? Immediately. The plan is to lie on it while playing SNES at home. We have committed to this plan.
My younger one picked a pink Yoshi egg. My husband — who genuinely never buys souvenirs — came away with a mug and a T-shirt. The man who spent 40 minutes alone in an exhibition hall about 1990s cartridges. Draw your own conclusions. 😄
A note on the small keyrings: they come in random assortments (like a lucky dip / blind box), so if you’re hoping for a specific character, the odds are 50/50. We gave it a pass.
🎟️ Keep your entry pass until the very end. You need it to pay at the shop — and again at the exit gate. Do not lose it. We left at 5:45pm. The entry pass was still required at the exit turnstile.
On the train home, both exhausted kids were asleep within minutes — using their new cushions as pillows. A large SNES controller cushion is, it turns out, an excellent travel pillow. 🐻
📱 Stay Connected: Mobile Data for Your Japan Trip
You’ll use Google Maps constantly around Kyoto — navigating train types, finding the right exit, figuring out where Kappa Sushi is on the route. We rely on the Airalo eSIM (Moshi Moshi Japan plan) for all of it. It runs on the SoftBank network, hotspot tethering is officially supported (so the kids’ tablets stay online too), and you set it up before you leave home.
👑 Exclusive! Exclusive Airalo Promo Codes
Skip the Lines! Instant Mobile Data for Japan
Install the free app first,
then choose your plan inside the app!
⚠️ Enter the code at checkout
to secure your discount!
🗓️ Building a Kyoto Day Around Nintendo Museum
Realistically, Nintendo Museum is a half-day to full afternoon commitment. We arrived at 2pm and left at 5:45pm. If you go earlier and use all your tokens, you can easily fill 4+ hours.
Our recommendation: one other activity in the morning + Nintendo Museum in the afternoon. The Kintetsu line connects easily to central Kyoto, Nara, and Osaka, so it pairs well with most itineraries.
Planning the rest of your Kyoto trip? We’ve put together a full family guide:
👉 Kyoto with Kids: Our Recommended 1-Day Family Itinerary

✅ Pre-Visit Checklist
🎒 Pack List
☐ Photo ID for every adult (passport / driver’s licence / My Number Card)
☐ ID for kids too (any form of ID accepted for children)
☐ Compact umbrella or hat (the walk from the station gets hot in spring/summer)
☐ Light jacket (just in case — air conditioning varies by person)
☐ Lunch reservation sorted before arrival (Kappa Sushi on the route is convenient)
- 10 tokens per person, no top-ups. Decide your priority experiences in advance. Start with Zapper if you want it — longest queue, highest cost.
- No food inside (with limited exceptions). Eat a proper meal before entering, especially for afternoon slots.
- Peak crowds: 12:00–3:00pm. Café and experience queues are longest then. After 5pm, things quiet down significantly.
- Don’t issue your QR ticket until you’re sure you’re going. Free cancellation is available before the QR is displayed — a huge win for families with young children.
- Keep your entry pass the entire time. You need it for the shop, the exit gate — everything.
- Local or semi-express trains only to Kintetsu Ogura. Express trains do not stop there.
- No car parking or bike parking on-site. Public transport only.
We went in slightly unsure what to expect — and came out with empty token wallets, a giant cushion, and a 7-year-old who had just discovered her love for 30-year-old SNES games. The Nintendo Museum absolutely delivered for our family.
I hope this guide gives you the confidence to arrive knowing exactly what you’re walking into. Have an amazing visit! 🐻✨
▶ You Might Also Like


コメント