I walked this exact route in June 2026 on a solo scouting trip, timing every step and checking every elevator with one question in mind: would this work with a stroller and kids? Station layouts can change, so please double-check signs on the day. This article contains affiliate links.
Let’s address the fear first: yes, Tokyo Station is enormous, and yes, the Keiyo Line — the train to Tokyo Disney Resort — is famously tucked away in a far corner of it, four floors underground. If you’ve read horror stories about this transfer, they’re not entirely wrong.
But here’s what those stories don’t tell you: you can do the entire transfer using only elevators, without carrying your stroller up or down a single step. I scouted the full route myself in June 2026 — walking it alone, but simulating every move a parent pushing a stroller would make: taking only the elevators, checking every restroom along the way, and mapping it all into 14 photo-guided steps. Even my hopeless sense of direction survived — the signage carries you the whole way.
- ⚡ Quick Answer
- 🚉 Why This Transfer Has a Scary Reputation
- 🗺️ The 14 Steps: Shinkansen Platform → Keiyo Line Platform
- Step 1 — Exit the Shinkansen and head for the JR transfer gate
- Step 2 — Follow the red “Keiyo Line” signs
- Step 3 — You’ll see stairs going down. Do NOT take them
- Step 4 — Turn left at the information counter
- Step 5 — Go straight, past the Shinkansen transfer gate on your left
- Step 6 — At the end of the corridor, turn left
- Step 7 — Follow the overhead and floor signs (restroom here)
- Step 8 — Stairs ahead: your elevator is the PINK one, just to the left
- Step 9 — Ride the moving walkways
- Step 10 — Find the second pink elevator behind the coin lockers
- Step 11 — Off the elevator: stained glass, turn left
- Step 12 — Pass the Disney Store (almost there!)
- Step 13 — Take Elevators 3 & 4 down to the platform
- Step 14 — You made it: the Keiyo Line platform
- 🚻 Restrooms & Diaper Changing Along the Route
- 🚆 Keiyo Line → Maihama: The Easy Part
- 🏰 Arriving at Maihama Station
- ❓ FAQ
- ✅ You’ve Got This
⚡ Quick Answer
| Route | Shinkansen platform → Keiyo Line platform (inside Tokyo Station) → Maihama Station |
| Transfer time | About 40 minutes with a stroller, elevators only (we stopped to check restrooms — you can do it faster) |
| Stairs required | Zero. Elevators cover every level change |
| Train to the parks | Keiyo Line, platforms 3 or 4 — both stop at Maihama. About 17 minutes |
| Signs to follow | The red “Keiyo Line” signs, overhead and on the floor |
| Landmarks you’re on track | Pink elevators, then the Disney Store |
Going to Disneyland instead of DisneySea? Same route. These 14 steps end at Maihama Station — the gateway to the whole Tokyo Disney Resort. Disneyland is a short walk from the station gates, and DisneySea is a quick monorail ride away.
🚉 Why This Transfer Has a Scary Reputation
The Keiyo Line platforms sit roughly 400 meters from the main concourse and four floors down. For most travelers that means a long walk with several level changes — annoying with a suitcase, potentially miserable with a stroller and tired kids if you don’t know where the elevators are.
That’s the entire problem, and it’s solvable. Tokyo Station has an unbroken elevator route to the Keiyo Line — it’s just not obvious unless someone shows you. That’s what the 14 steps below are for. One mindset tip before we start: treat the transfer as part of the journey, not an obstacle. Budget 40 minutes, let the moving walkways entertain the kids, and you’ll arrive at the platform calm instead of frazzled.
🚐 Before we start — the “skip it all” option. This guide will get you through the maze with a stroller, step by step, and it genuinely works. But if you are reading this and already feeling tired, know that a zero-maze alternative exists: a private van from the Tokyo Station area straight to the park gates. It costs more than the train — but the stroller rides in the trunk, the kids stay asleep, and there is not a single elevator to hunt.
Sticking with the train? Good choice too — it is absolutely doable, and your wallet will thank you. Here we go. 💪
🗺️ The 14 Steps: Shinkansen Platform → Keiyo Line Platform
Step 1 — Exit the Shinkansen and head for the JR transfer gate
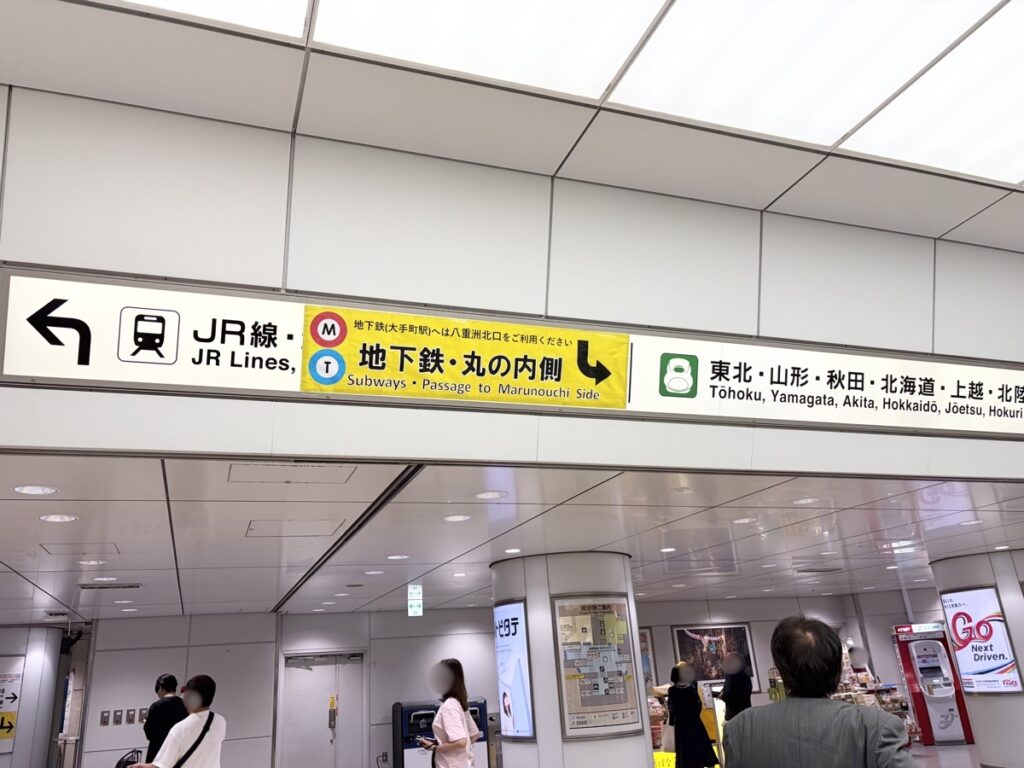
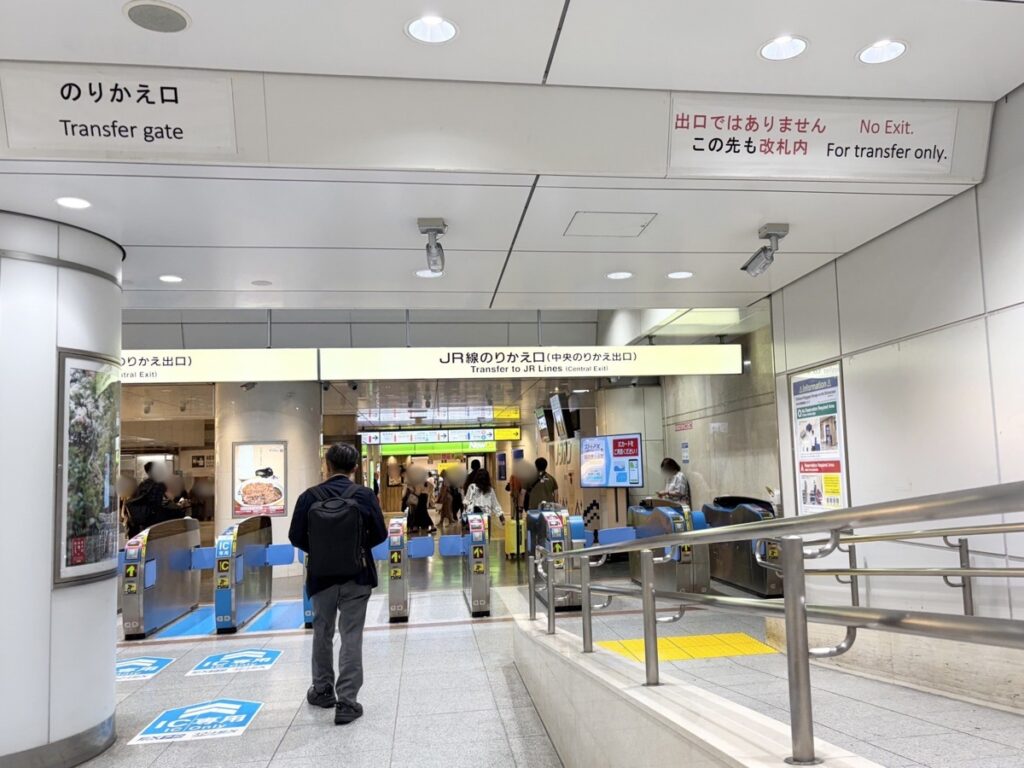
Don’t exit the station — you want the JR transfer gate, which lets you move from the Shinkansen area into the regular JR lines without leaving the paid area.
Step 2 — Follow the red “Keiyo Line” signs
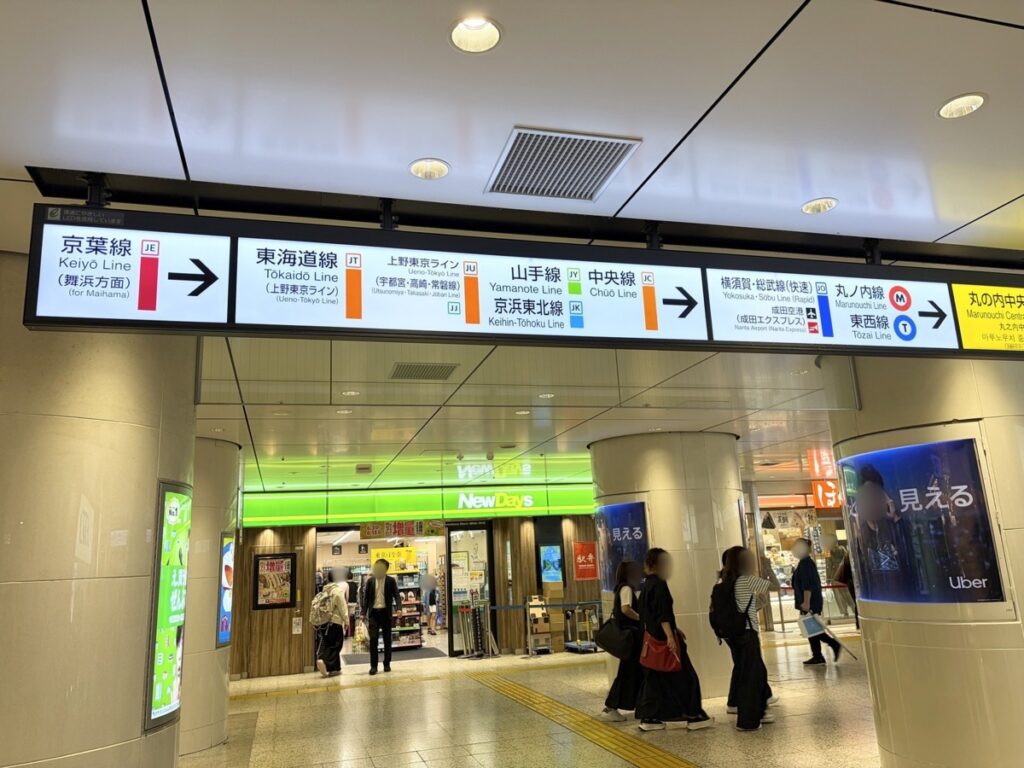
From here on, one rule: follow anything red that says “Keiyo Line.” The signs appear overhead and even on the floor, one after another. You genuinely cannot get lost if you keep spotting them.
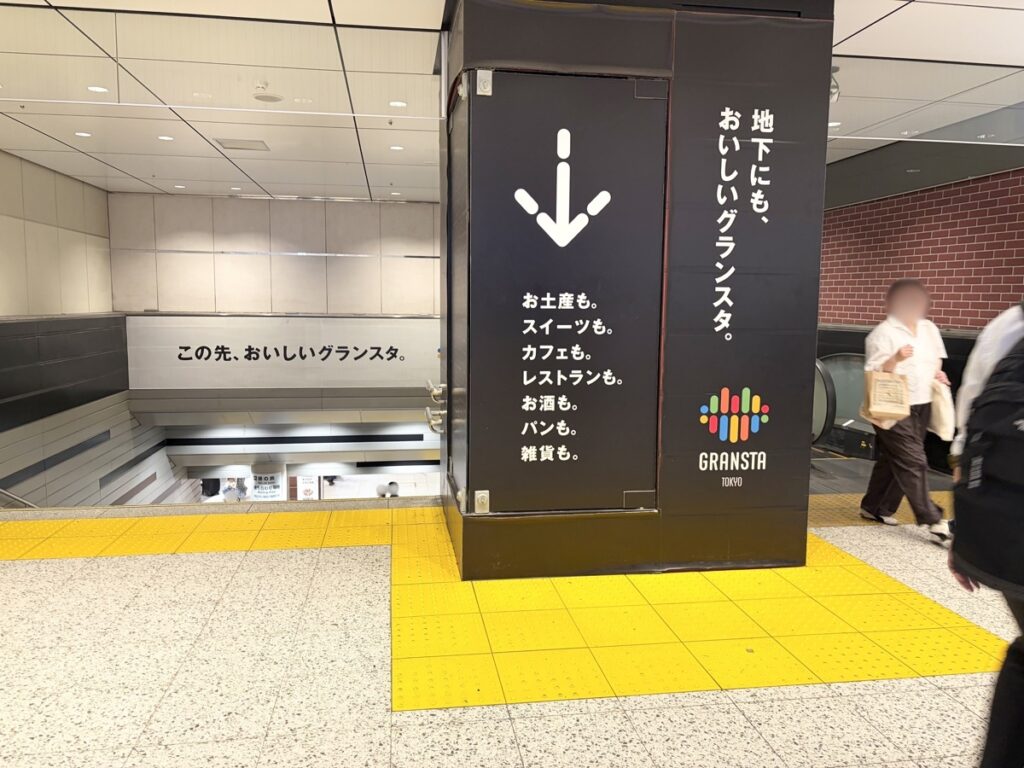
Step 3 — You’ll see stairs going down. Do NOT take them
Early in the walk, a set of stairs and escalators appears, heading down. It looks tempting — but it’s not your route. Walk straight past it.
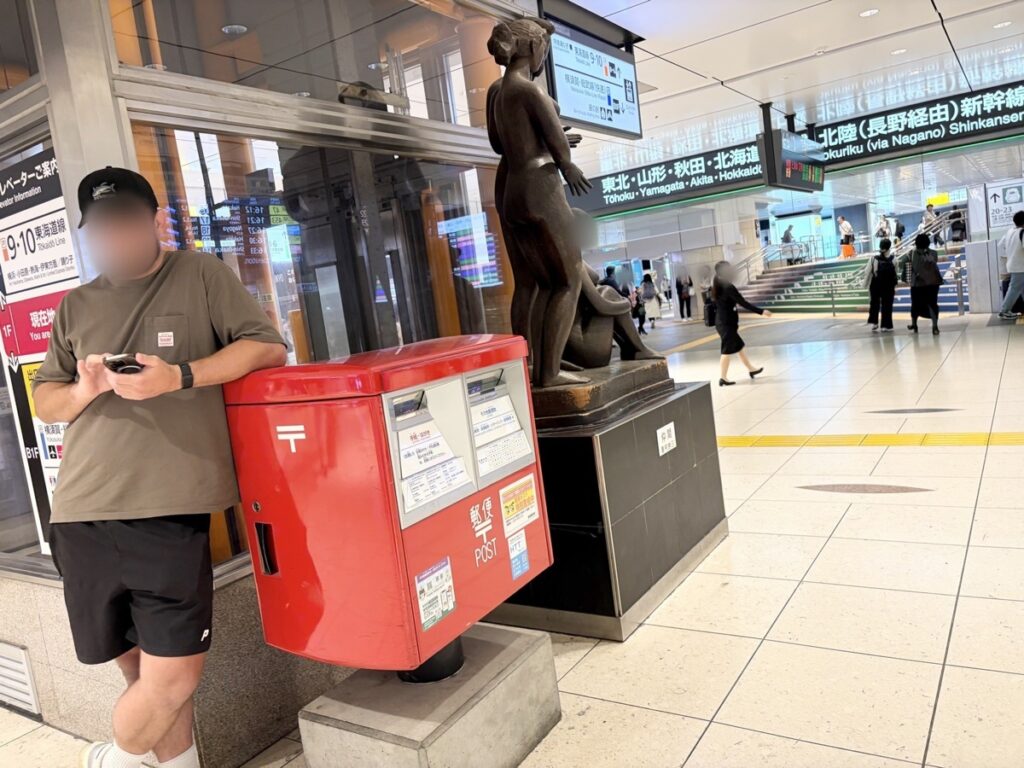
Step 4 — Turn left at the information counter
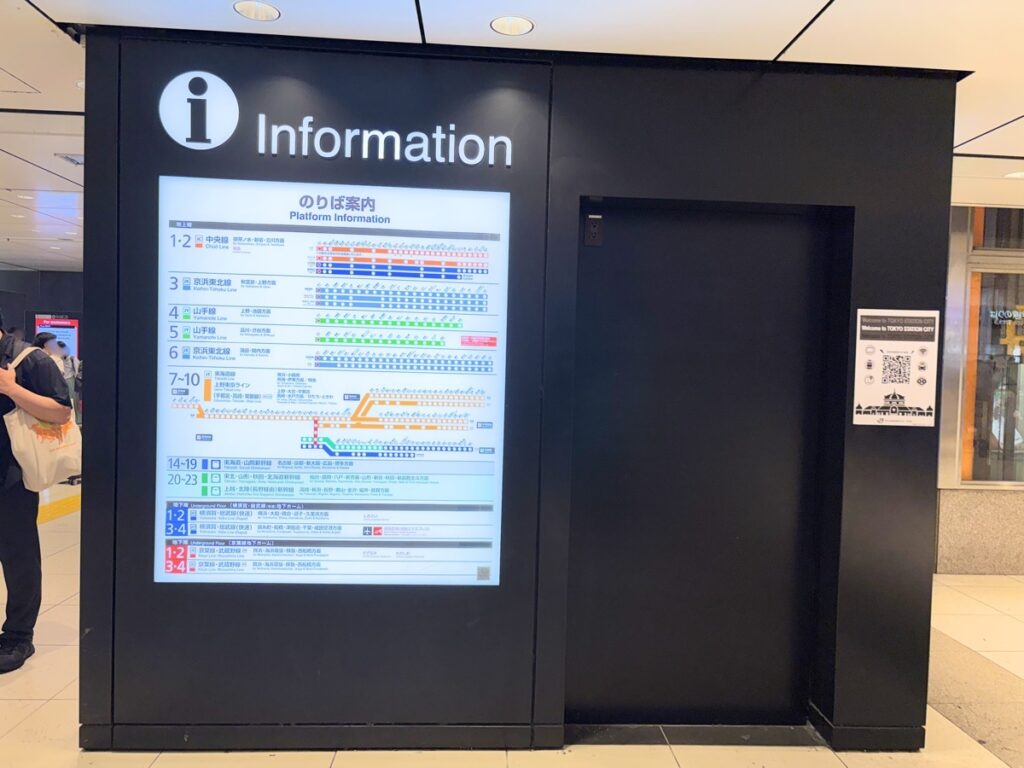
Step 5 — Go straight, past the Shinkansen transfer gate on your left
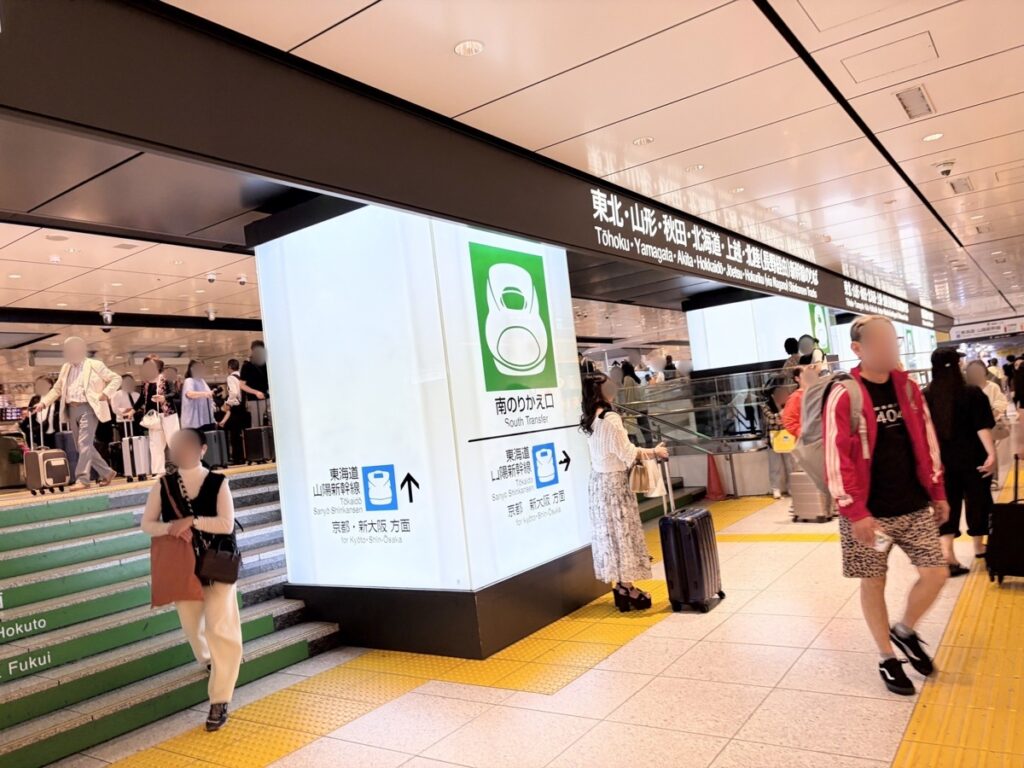
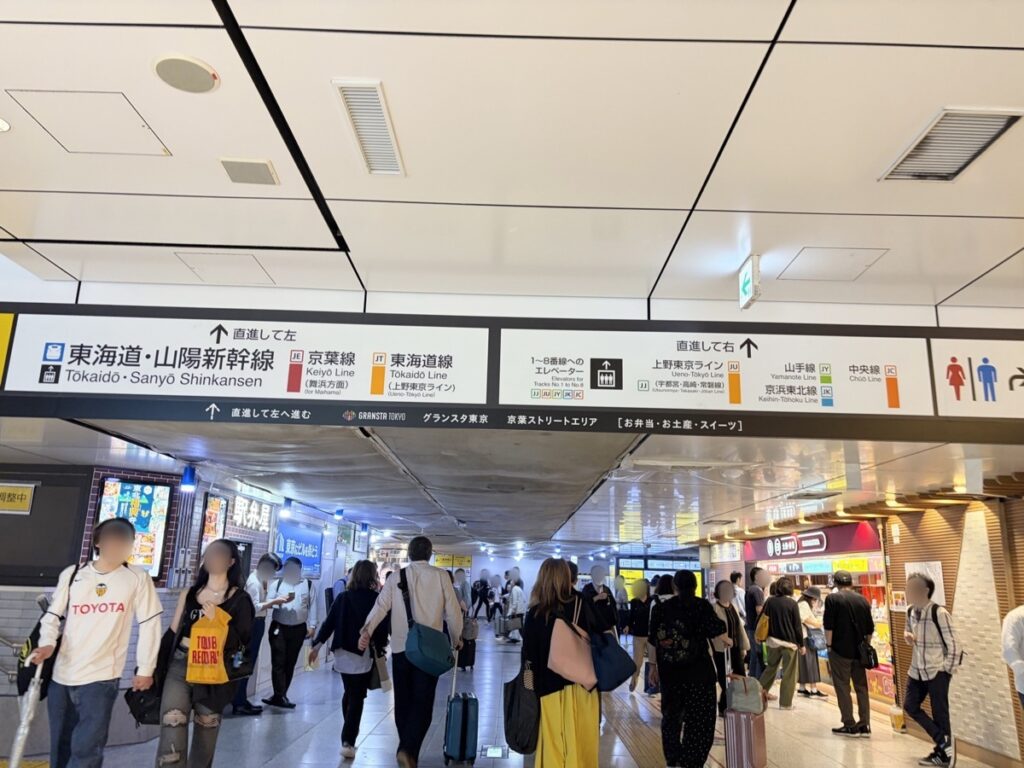
Step 6 — At the end of the corridor, turn left
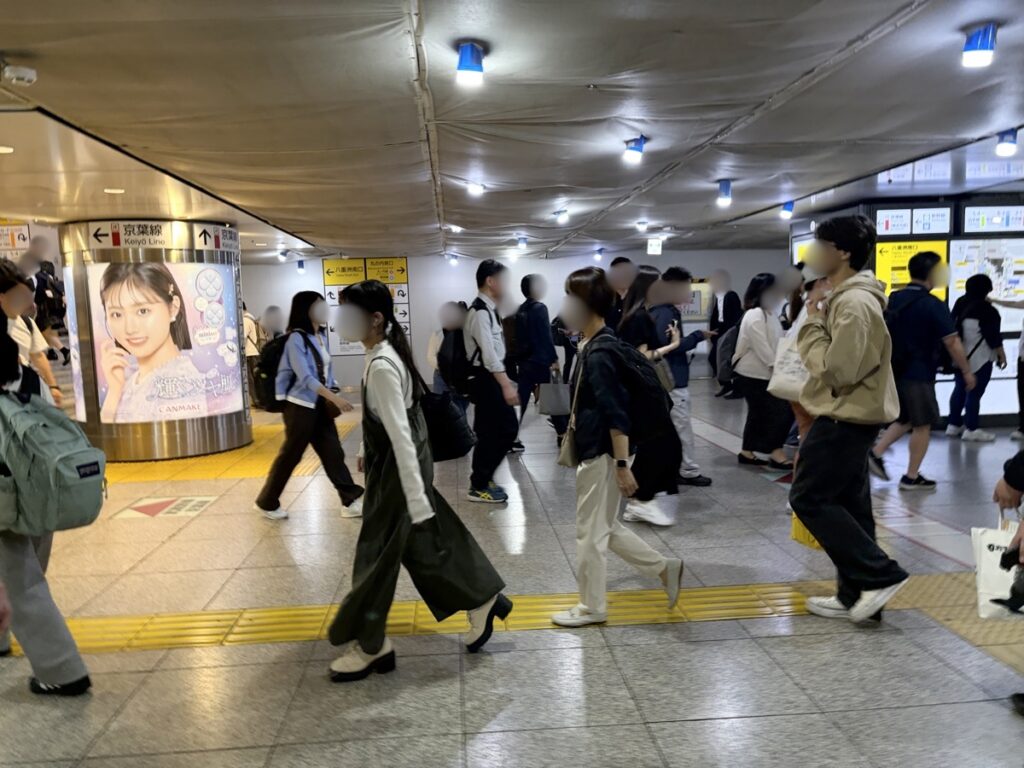
Step 7 — Follow the overhead and floor signs (restroom here)
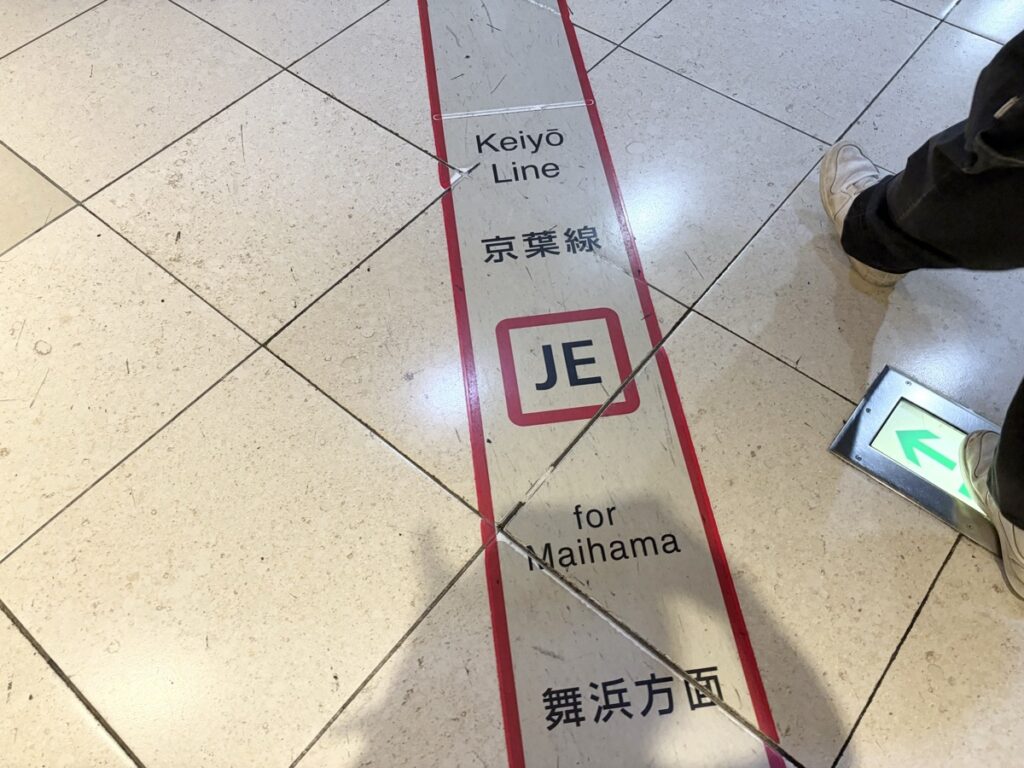
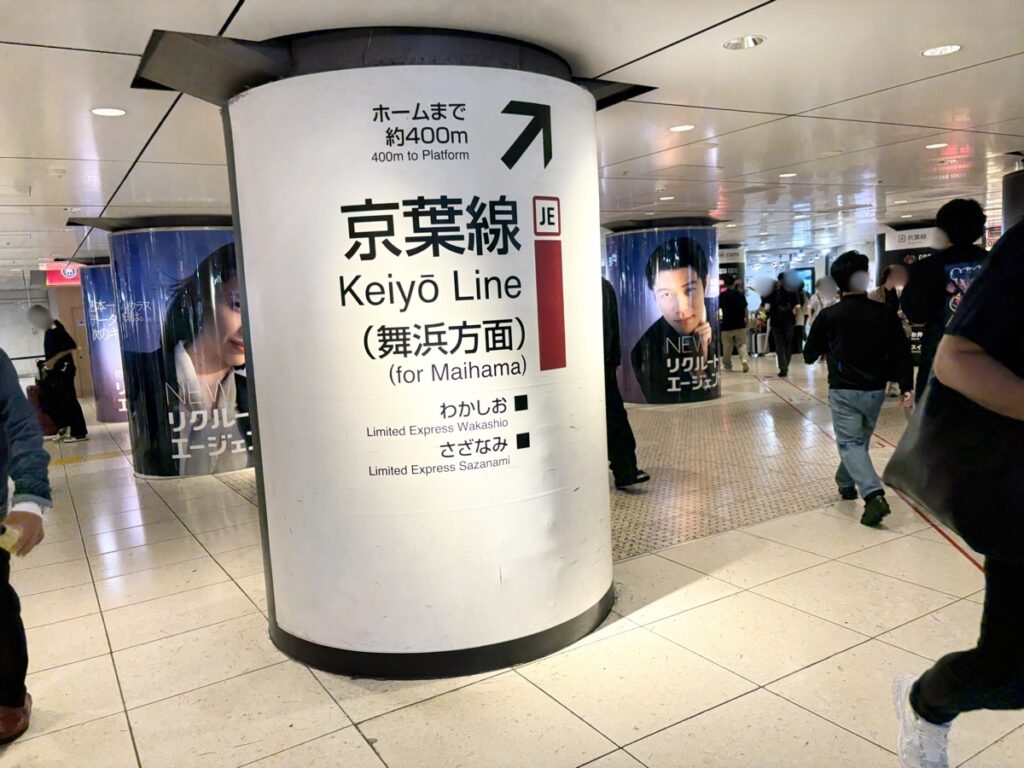
There’s a restroom in this area. Good to know: the diaper-changing table is in the very last stall, so head all the way to the back.
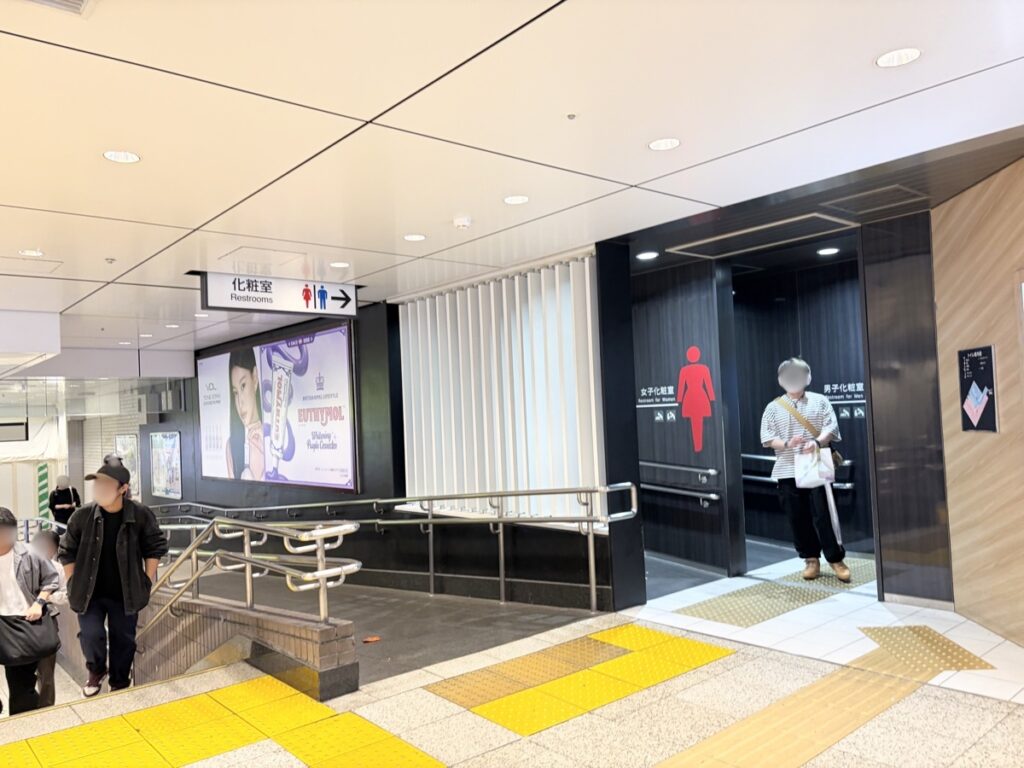
Step 8 — Stairs ahead: your elevator is the PINK one, just to the left
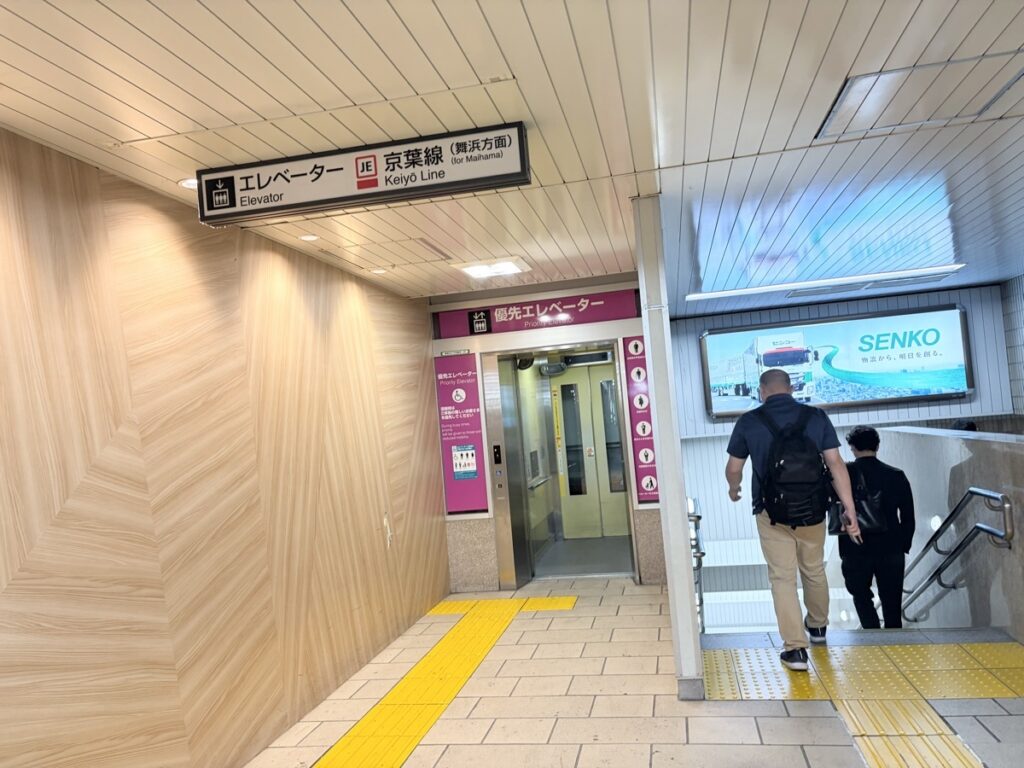
This is the first of the pink elevators — remember that color. Spotting a pink elevator means you’re exactly where you should be.
Step 9 — Ride the moving walkways
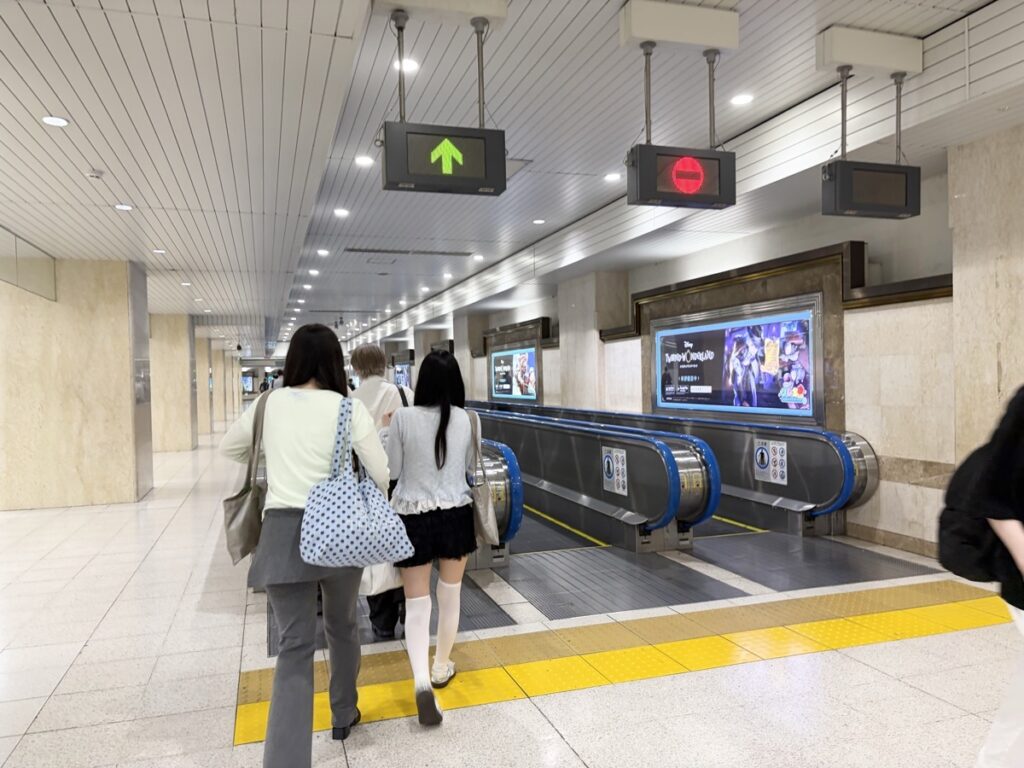
A stroller is fine on the moving walkways — just keep it stationary while you ride (don’t push). Our kids treated this stretch as a free ride, which conveniently resets their walking morale.
Step 10 — Find the second pink elevator behind the coin lockers
Another descent appears, and your instinct says “not more escalators…” — but look left. There’s an elevator sign pointing into a corridor lined with coin lockers. Walk through the lockers and the second pink elevator is at the back. Take it down. Around here you’ll feel the cool underground air, and the kids start sensing the train is close.
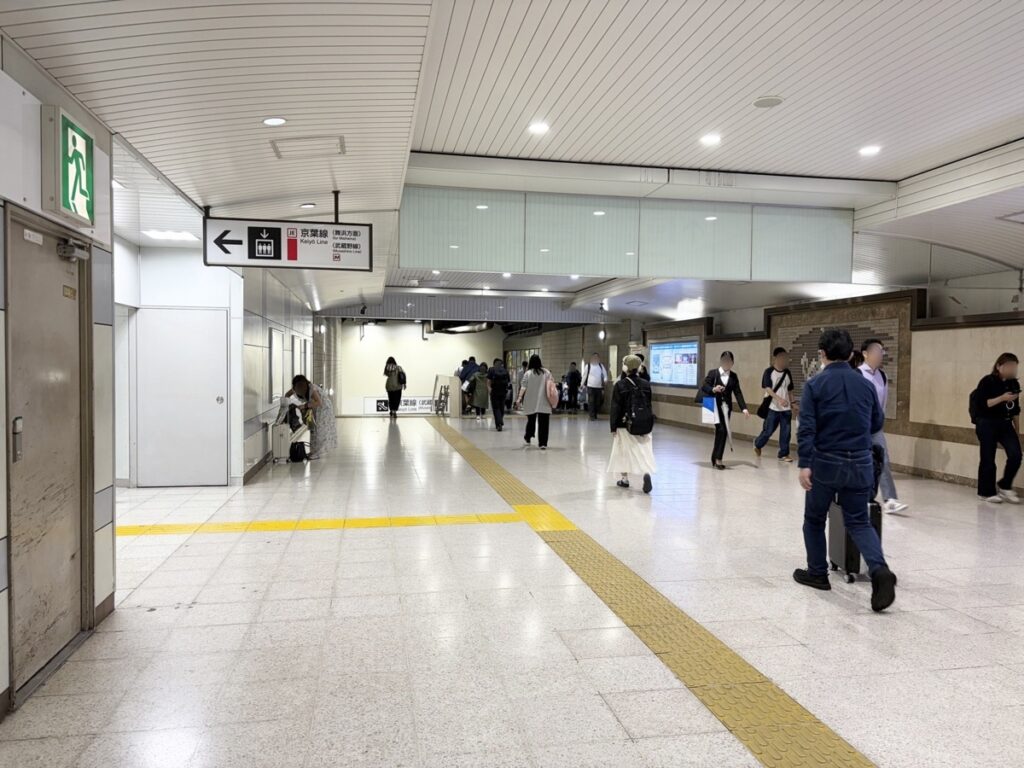
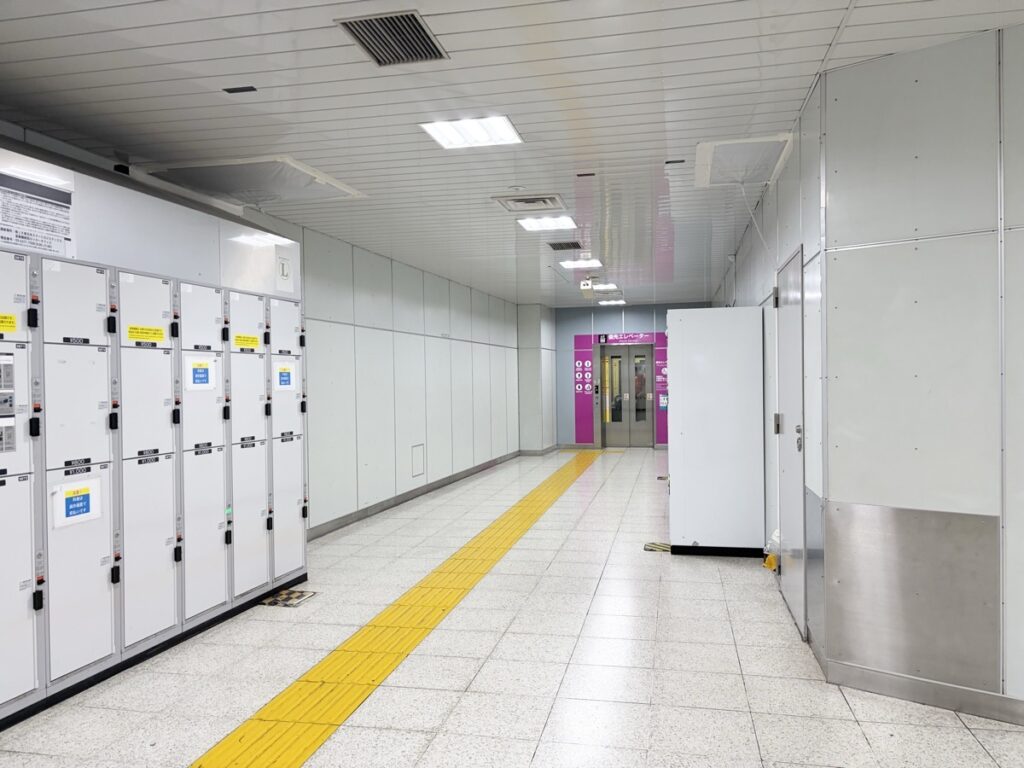
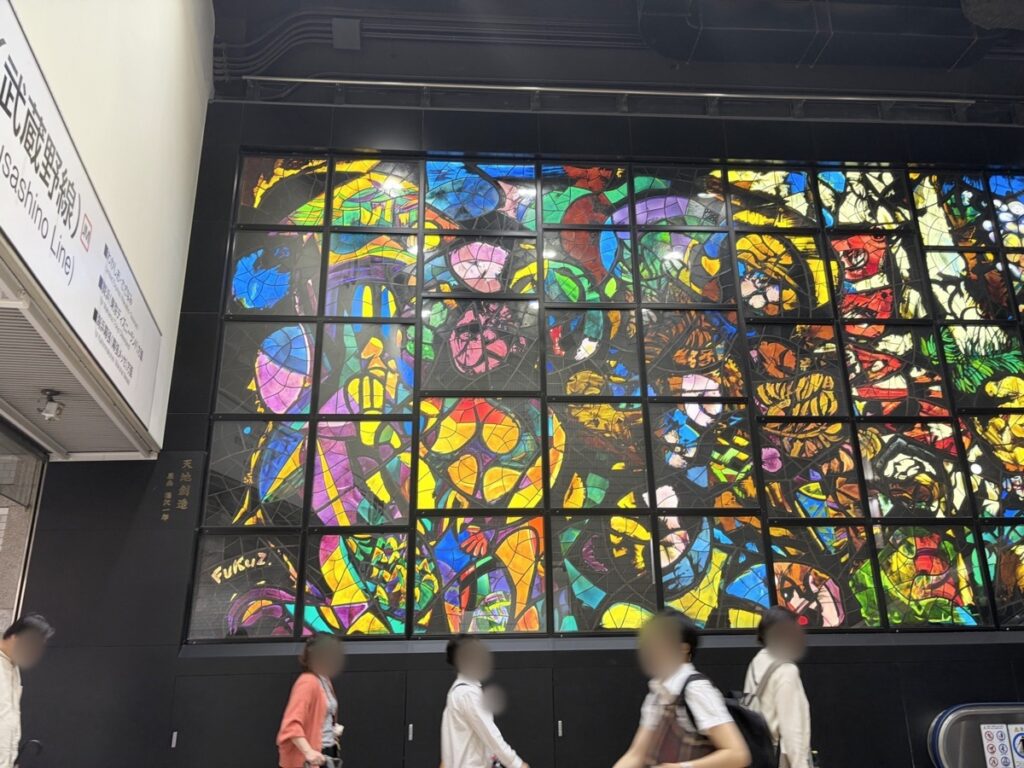
Step 11 — Off the elevator: stained glass, turn left
When the doors open you’ll see a stained-glass artwork. That’s your cue — turn left.
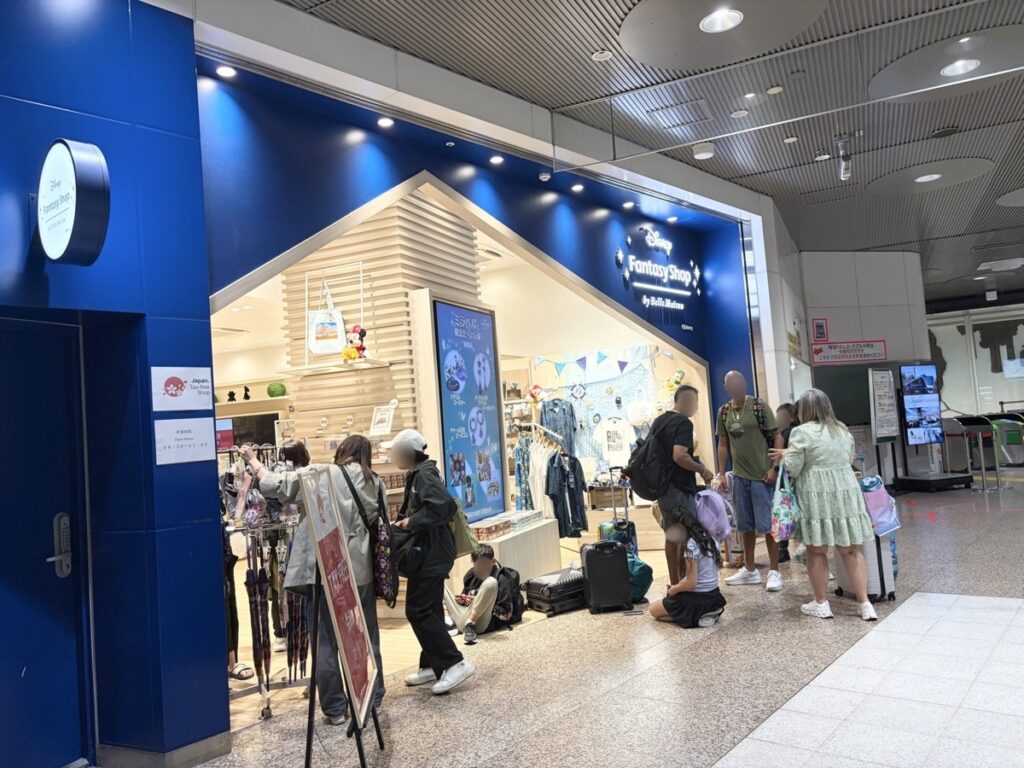
Step 12 — Pass the Disney Store (almost there!)
A small Disney Store appears on this level. For kids, this is rocket fuel — and for you, it is confirmation that the platform is minutes away.
Step 13 — Take Elevators 3 & 4 down to the platform
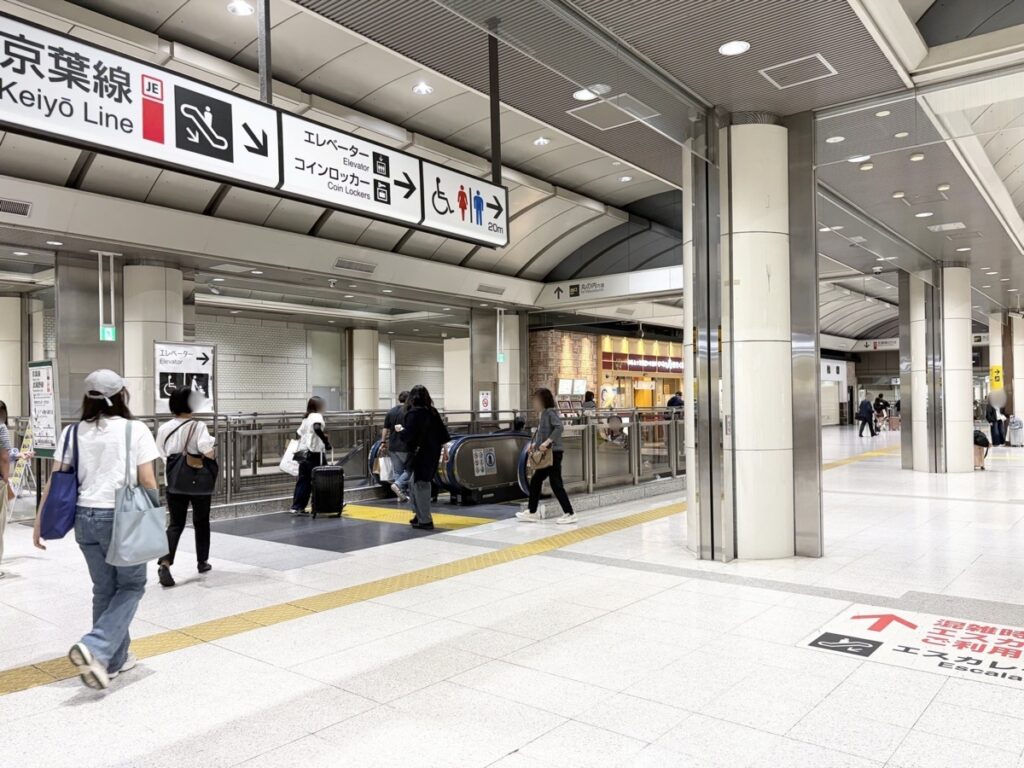
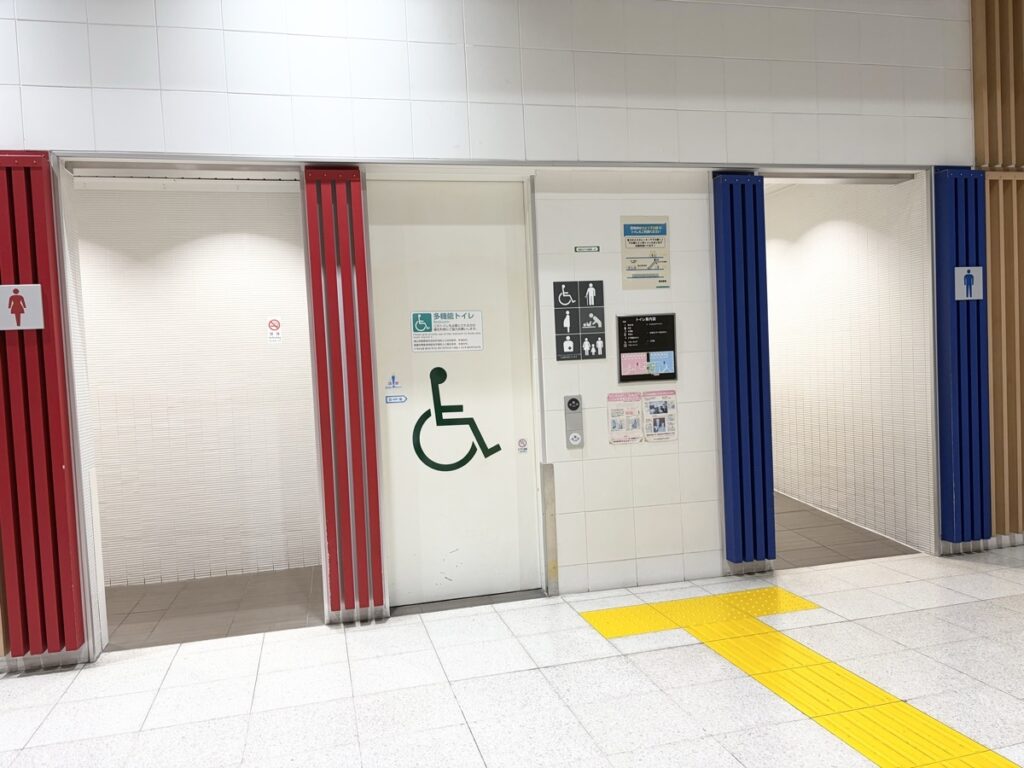
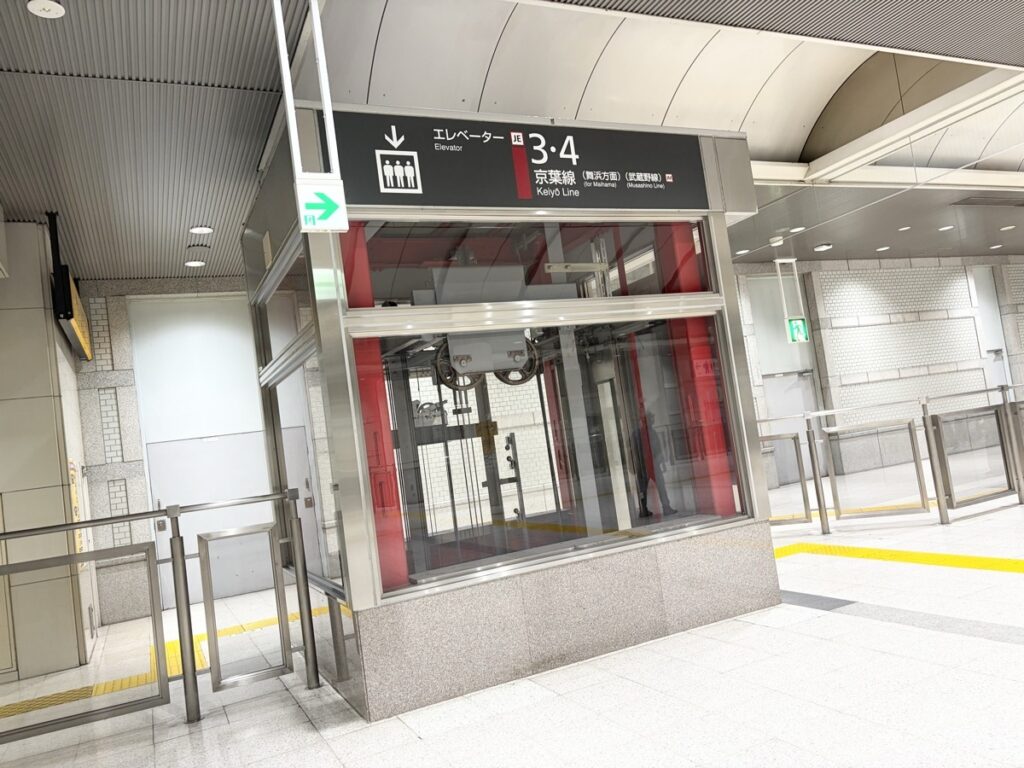
With a stroller, skip the escalator next to the Disney Store and continue down the corridor — past a restroom on your right (diaper table available, accessible stall in the middle) — until you see a pair of elevators ahead — take the left-hand one, marked “3・4”. It drops you onto the platform for tracks 3 and 4, and here is the good news: for Maihama, either track works — trains on both run in the Maihama/Soga direction, so board whichever comes first.
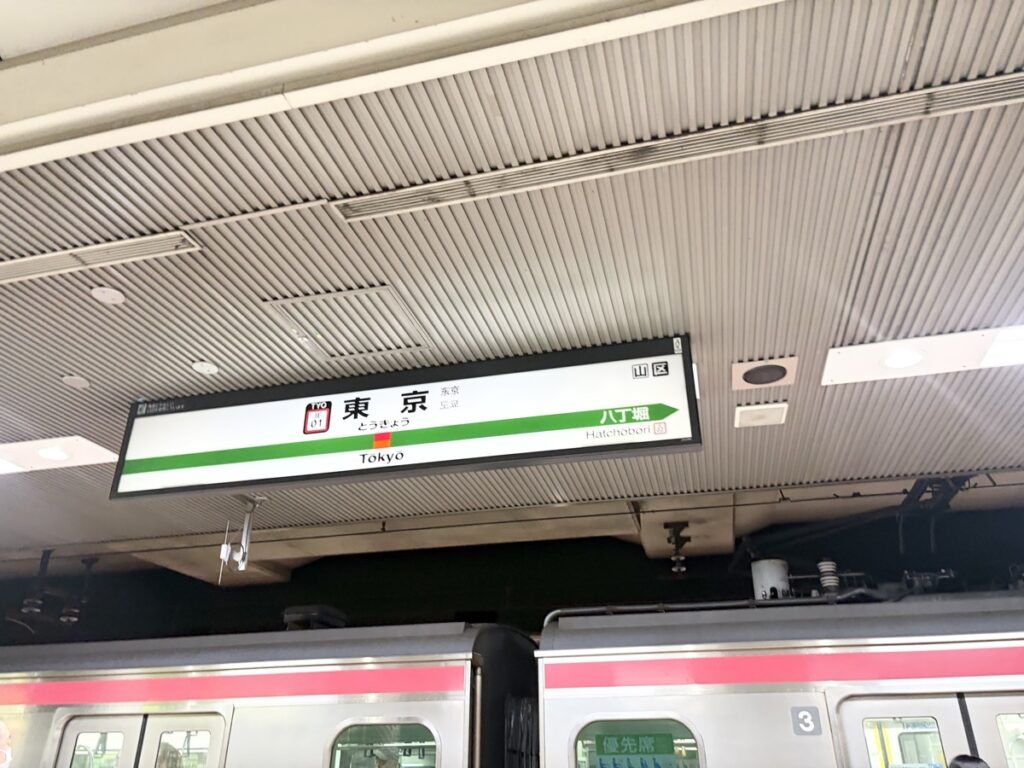
Step 14 — You made it: the Keiyo Line platform
① A pink elevator — the correct route uses two of them
② The Disney Store — once you see it, the platform is just ahead
And one warning: don’t take the first descending stairs at Step 3. The route stays level until the pink elevator at Step 8.
🚻 Restrooms & Diaper Changing Along the Route
| Location | Diaper table | Accessible stall |
|---|---|---|
| Baby lounge below Step 3 (escalator down) | ✅ + nursing room | ✅ family restroom |
| Mid-route restroom (Step 7) | ✅ in the last stall | — |
| Near the Disney Store (Step 13) | ✅ | ✅ middle stall |
🚆 Keiyo Line → Maihama: The Easy Part
- Board any train from platform 3 or 4 (toward Maihama / Soga) — both stop at Maihama
- Ride time: about 17 minutes
- Phone signal can dip in the tunnel sections but returns above ground. In our test, Google Maps still worked four floors underground at Tokyo Station on our Airalo eSIM
We even ran a speed test on the moving train, on our Airalo eSIM: 27Mbps down / 20Mbps up, with jitter at a rock-steady 5ms — more than enough for videos, maps and translation apps the whole way to Maihama.
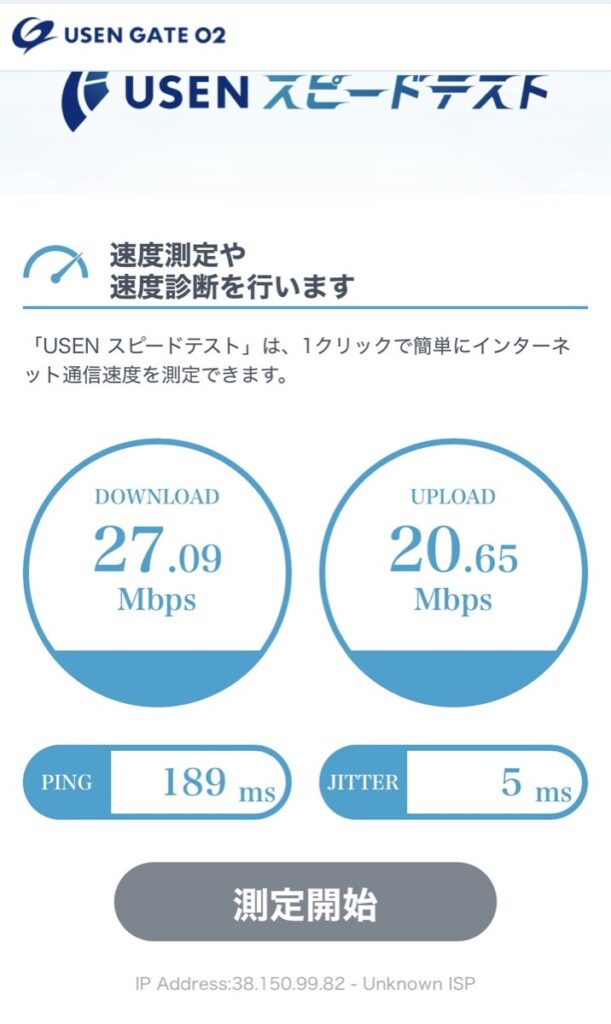
That last point matters more than it sounds: this whole transfer leans on your phone — maps, train times, and translation if you need to ask staff for help. If you haven’t sorted your data yet, an eSIM you can set up before you fly is the low-stress option we actually used.
You’ll rely on your phone all day — Google Maps navigation, real-time train info, attraction wait times, and messaging when your group splits up. We used Airalo Japan eSIM on our family trip and it activated the moment we landed at the airport. No SIM card swap, no standing in line at the airport counter.
✅ Google Maps kept working four floors underground at Tokyo Station in our test
✅ Install the app before you fly — activates on arrival
✅ 15% OFF with code MAMABEARNEW
📱 Read Our Airalo Japan eSIM Review + 15% OFF Code →
How to buy it and set it up — the full walkthrough with screenshots of every step is here:

Reader-Exclusive Airalo Promo Codes
Cheaper than pocket WiFi — no contract, no pickup
👉 Get Your Japan eSIM on Airalo⚠️ The code goes in automatically — if you don’t see it, enter it at checkout
🎁 First-time users (15% OFF)
MAMABEARNEW
🎁 Existing users (10% OFF)
MAMABEAR
🏰 Arriving at Maihama Station
- Take the South Exit — Tokyo Disney Resort is right there (Disneyland is a short walk from the gates)
- Coin lockers are available near the exit if you want to drop bags before the park
- Heading to DisneySea or a Bayside hotel? Hop on the Disney Resort Line monorail — our stroller-friendly guide covers tickets, fares and the secret front seats👇
👉 Disney Resort Line with Kids: Tickets, Strollers & the Secret Front Seat
❓ FAQ
- QCan I really do the whole transfer with a stroller?
- A
Yes — we did, without folding the stroller once. Every level change on this route has an elevator. The only rule is to ignore the early staircases and follow the elevator route described above.
- QHow long should I allow?
- A
We took about 40 minutes, including two restroom checks. Moving at a normal pace with kids, 30–40 minutes is a realistic budget. Solo travelers without luggage do it faster, but don’t plan your connection around their pace.
- QDo all Keiyo Line trains stop at Maihama?
- A
From platforms 3 and 4 (Maihama / Soga direction), the trains we’re talking about all stop at Maihama — you don’t need to decode express-vs-local before boarding. When in doubt, the platform displays show whether Maihama is on the stop list.
- QIs there anywhere to change a diaper on the way?
- A
Three spots: the baby lounge below Step 3 (the full setup — nursing room included), the restroom at Step 7 (last stall), and the restroom near the Disney Store at Step 13. See the table above.
- QDoes this route work for Disneyland too?
- A
Yes. The route ends at Maihama Station, which serves the whole Tokyo Disney Resort. Disneyland is a short walk from the South Exit, and DisneySea is a few minutes away on the Disney Resort Line monorail — every step in this guide is identical for both parks.
🍼 Traveling Japan with a baby or toddler? These guides will save your trip:
✅ You’ve Got This
You can absolutely do this by train — families do it every day, and now you have the exact route in your pocket. But if you have read this far and your honest reaction is “that is a lot with our crew”… there is no shame in booking the van instead. Door to gate, zero elevator hunting, zero decisions.
The Tokyo Station transfer looks intimidating on paper, but it comes down to three things: follow the red Keiyo Line signs, trust the pink elevators, and smile when you see the Disney Store. Forty minutes after stepping off the Shinkansen, you’ll be on a train watching your kids buzz about Mickey.
▶ More for your Tokyo Disney trip